American Standard Easy Touch Faucet Parts

For the best and latest presentation of my favorite techniques, see Chapter 4 of . Meanwhile, here's a collection of tips I've discovered myself and(Thanks especially to Rob Bowker, Gregory Fischer, Paul Dobias, Tim McCoy, Jared Mogensen, Jett Morton, Paul Musgrave, Lynn Myers, Robert Neuwirth, Paul Panella, Joseph Pierson, George Prytulak, Paul Ross, Matthieu Th�or�t, Lane Welch, and PeterEverybody, if you have more tips, ! Before you do anything: Think about whether you're willing to live with the consequences if you mess up. Try to make sure that your alterations are reversible, and don't do anything to a truly rare machine other than gentle dusting and cleaning. best way to get familiar with restoration techniques is to experiment on an ordinary typewriter first (how about a good oldWhenever possible, test all these techniques on a hidden surface of the typewriter before you attack the main Online Typewriter Support, by Will Davis,

provides further advice on operating, maintaining, and repairing a For more good ideas about restoration, check out The Names of some products below are linked to Google Products so you can compare prices online. Initial cleanup and lubrication Click here for a basic illustrated guide to cleaning and lubrication from a 1977 Reader's Digest book. These are happy hours for me, as I get to discover the various parts and features of my new typewriter and I start to uncover the beauty hidden under the filth. The paint on your typewriter may appear cracked and dull, but chances are that you are looking at decades' worth of tightly compacted dirt, grease, ink, sweat, and cigaretteIf you can manage to remove that layer of crud, you may find that the underlying paint job is still smooth and can be made toIf you're unlucky, the crud will turn out to be a layer of varnish applied at the factory, which has grown wrinkly and brown
that can be hard to remove. Of course, if you're lucky enough to find a typewriter that has been kept in a case, this won't be an issue -- it will just need a little loving care. you'll find the following items useful: The following substances can help remove dirt and grease (often old typewriters have been over-oiled at some point in the past, or even
Mobile Homes For Sale Gilford Nh dipped in a vat of oil, which in the long term turns into a sticky
Bmw T Shirts Malaysia mess that must be removed).
Reviews Of American Standard Champion 4 Toilet How do you remove mold from a typewriter? Improving paint, metal, and rubber The typical deep-black color of an early typewriter consists of

lacquer, which is quite difficult to restore. introduced in the 1920s. Typewriters also have many metal parts which are susceptible to rust and discoloration. parts of older typewriters are nickel-plated; The platen is the printing surface of a typewriter -- normally, aThe rubber on an old platen may get hard and slick, so that it doesn't grip paper properly and the type hits it with a harsh, loud impact. Here's the sensuous phase. Loving applications and re-applications of polishing agents will leave your typewriter looking glossy, freshYou'll be amazed at the difference! Manual typewriters operate on relatively simple principles, and you can usually fix a problem using patient investigation and someBut don't underestimate the need to keep track of all the parts you remove! You can easily find yourself with a pile of parts that you can't fit together again. Check , by Will Davis, for further advice on operating, maintaining, and repairing a manual typewriter.

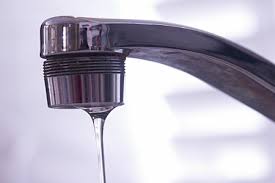
So now you're ready to do some actual typing with your machine! if you're not going to use it for everyday correspondence, it's nice to know that it's functioning and "alive" once again. deal with a few issues such as inking, clean type, and alignment.Expert Help is Here! Call or Text 800-518-5388 A common problem in a kitchen faucet is low water pressure. Low water pressure in a kitchen faucet can be caused by clogs, corrosion in the pipes, or delivery pressure from the main source. Identifying the problem will help greatly in the actual repair, making it fairly easy if the troubleshooting is done properly. However, there may still be times when you will need to call in a professional. Problems with water pressure can be divided into two main categories, based on whether or not the problem is persistent throughout your home. If you have remodeled your home to increase living space and added more water fixtures, you may have decreased your water pressure. You will need to put in a larger water main pipe to fix this problem.

If you have low water pressure throughout your home, a supplemental booster pump in the line should keep the water pressure up. Both of these types of fixes are best conducted by a plumbing professional. If you find that the low pressure is only in the kitchen faucet, the cause is likely debris in one of several places leading up to the faucet. These problems fortunately can be fixed by DIYers. Start looking for the cause by first checking the aerator screen on the faucet, following the rest of these steps after to free your fixtures and piping of clogs or debris. On most faucets there is a small screen at the end of the faucet spout where the water comes out. Unscrew the spout by hand and remove any blockage in the screen. You may find sediment clogging the screen as well, but removing sediment is a minor cleaning project.Disassemble it and soak the parts in a warm water and vinegar solution. If the blockage remains, you can try a commercial calcium remover. Dry the spout, reassemble, and reattach to the faucet.
Once it is replaced, turn on the faucet to see if pressure has been restored. In some faucets the cartridge that moves to allow the water to pass through can malfunction or stick. You can easily replace it or free it from items keeping it closed. To remove the faucet head, find the screw under the faucet spout. Unscrew it and lift off the faucet head. The cartridge should be open. If not, remove the thin housing. Clean everything of debris or calcium buildup with calcium remover. Replace the thin housing and faucet head. Try the faucet again to see if the water is flowing as it should. You may have a buildup in the pipe leading to the faucet. If the piping is galvanized piping, it's most likely accumulated debris from age and sediment. You can remove or unscrew the riser from the basement with a pipe wrench. Back up the fitting in the basement so the fitting or pipe attached does not break. With a bucket and another person, turn the water on and see what the pressure is from the pipe that you just removed.