Beveled Mirror Glass Thickness

Home > Products & Services > Mirrors > Beveled mirrors Beautify your home with beveled mirrors from ABC Glass and Mirror, Inc.! Putting a beveled edge on a piece of mirror glass makes it more decorative, and this is perfect for many interior designs. Choose the shape and size that’s right for your application and remember that we can also custom cut mirrors. Beveled mirrors can bring a splash of glamor to your living area; they can serve as attractive full-length mirrors; and they are a great choice for a vanity mirror. You will want to explore all your mirror options before making a selection, and we provide a free, no-hassle way for you to do this. You can schedule a consultation, and one of our glass and mirror professionals will come to your home to present mirror options, answer questions, and provide an estimate – all at no charge to you! Take the first step toward enhancing your home with beveled mirrors by calling us today – (703)257-7150! Glass thickness / usage
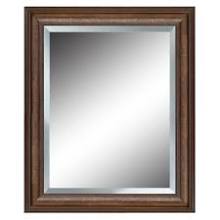
Not everyone is familiar with the term “beveled mirror”, but we have all seen these lovely mirrors. The contour of the glass around the edge of the mirror determines whether or not it is a beveled mirror. A regular mirror is uniformly smooth, and the glass near the edge is no different from the rest of the mirror’s surface. On a beveled mirror, the glass around the perimeter slants downward and ends in a thin polished edge.
Cottage Cherry Laminate FlooringThis look is created by running the mirror glass through a machine that cuts the glass around the perimeter and polishes the edge to a safe and aesthetically pleasing degree of smoothness.
Wood Flooring Auction Ontario ABC Glass and Mirror, Inc. supplies and installs beveled mirrors in a variety of shapes such as:
Mobile Homes For Sale Solvang Ca
Select the shape that’s right for your room and personal tastes! For a terrific look, try beveled mirrors from ABC Glass and Mirror, Inc. in your bath area. These are a great choice for the area above the sink. Consider a wall-to-wall beveled vanity mirror or one that reaches the ceiling; these are choices that can really illuminate your bathroom as light reflects off these vast mirrors. And don’t forget the powder room – an oval beveled mirror above the sink is a perfect match for many decorating styles. Add something special to the bedroom or dressing room in your home by replacing your old full-length mirrors with beveled mirrors from ABC Glass and Mirror, Inc. We can cut the mirror to your specifications so you can coordinate your apparel from footwear to headgear with one easy glance in the mirror! And simplify the morning rush by ensuring that you have a sufficient number of these mirrors to conveniently meet your household’s needs. There are a couple methods of installation for beveled mirrors, depending on the shape chosen.

If the mirror is flat along the lower edge, it rests on J-channel, L-bar, trim, etc. The weight of the glass makes it necessary for the mirror to rest on a support of some kind. Furthermore, the mirror is glued to the wall with mirror mastic. For shapes that are not flat across the bottom, like oval, we use small clear plastic clips that are attached to the wall with screws. Your custom beveled mirrors will fit correctly in the space you select. When we take the necessary measurements we also inspect the area, checking for walls that are out of plumb, corners that are out of square, and surfaces that are out of level. If any or all of these conditions are present, we will adjust the mirror dimensions accordingly. ABC Glass and Mirror, Inc. will cut your new mirrors to fit properly in your bathroom. If beveled mirrors sound like the right choice for adding sparkle and elegance to your home, call ABC Glass and Mirror, Inc. As a trusted local company, we offer quality mirrors with professional installation.

Our free in-home consultation and estimate offer makes it easy to get started. Pick up the phone and call today to schedule yours! Decor Wonderland Oval Frameless Mirror with Scallop Edges Decor Wonderland Hiltonia Oval Beveled Frameless Mirror 251 First Uptown Satin Nickel Frameless Oval Tilt Mirror withHow to Use a Glass Cutter There are all kinds of glass cutters and we believe that it depends particularly on what you feel comfortable with. We use Fletcher Carbides and Oil Cutters, pending on the job and the type of glass. The hone on the cutting wheel is what makes the cut. If you do not have the time or money to buy all types to try, then we suggest the Fletcher Gold Tip for those one time jobs you might have. They normally cost about four or five dollars There are only a few must keep rules to maintain your cutter. DO NOT cut the same “scribe” twice and try not to drop your cutter on a concrete floor. Is the cut that your cutter makes on the glass.

You can hear a scribe being made. This is a good way to know that you are doing it right, by listening to the scribe. If it skips, you should be able to hear it miss. If it does skip, you will not want to go back and make the entire stroke again. Just place your cutter right (more on this as we go), and only scribe where it skipped. Running your cutter over the same scribe even once can destroy a cheap cutter. Running your cutter over the same scribe a number of times can even destroy a good cutter. There is a lot of attention that needs to be spent on the art of using a cutter and listening to the scribe. When you get better, you will pay more attention to the “feel” of the cutter and you will know the feel of the pressure you put on the cutter. Even an old glazier will depend as much on listening to the scribe as he does the feel of the pressure on his cutter. By looking at the picture below, you will see how your index finger “manages” the pressure you put down on the cutter that will control the scribe.

Your middle finger will have a sideway pressure to keep your cutter up against the square/or straight edge for guidance. Even if you are trying to freehand a cut, holding your middle finger like this will help keep your cutter going the direction you want your cut to go in. We have found over the years that this way of holding the cutter always works, and works better in most cases. At times, when we cut off the rack on the truck or free handing a 2″ or 3″ cut, we will use the tip of our ring finger or little finger to run down the edge of the glass, using that hold as a basic straight edge for our free handed cut. If you put too much pressure you will get a “white scribe” that will often be to “HOT” to complete a good break. To recognize a HOT CUT: Make a scribe on the glass, then look at the scribe. If you see that it pops little fragments of glass chips off of it, that’s what we call a HOT CUT so lighten your pressure. The thicker the glass the harder it is to pull (break) your cut.

Under most circumstances, you do not want a HOT CUT. The point of attention should be given to putting “JUST” enough pressure to make the scribe. You should use a piece of trash glass to practice with. If you are using window glass to practice with, just put your square on the glass for cutting off 1″. Make a bunch of scribes until you get use to the pressure you need to make a clean scribe. We will be adding to this information as time allows us. For Drilling Holes for Electric Outlets: You will have to have a tripod drill with a 2″ Diamond Bit Drill, or go to someone who does. Necessary Reading: *A SCRIBE is the CUT MARK the glass cutter makes.* There is more than one way to skin a catfish, and many ways to cut glass. This is a brief description of “How We Do It”; hopefully it will help you have an idea as to what it takes and improve your outcome while working on your own project. There will be many things you will learn as you go about the task of cutting, but one of the most

important things to learn is the pressure you put on the cutter while scribing. With a new cutter, it does not take much pressure to see the scribe you are making. If you lighten the pressure and the cutter SKIPS…you will go back and scribe ONLY the section of space where there is no scribe. Running your cutter over THE SAME scribe more than once will damage your cutter and often it will not be useable after that without skipping each time you use it. If you have trouble keeping the same pressure on the cutter, you can dip your cutter in oil or spray WD-40 where you will be cutting. This will cool your cut but it makes it harder to see where you have skipped while scribing. IT IS BEST TO PRACTICE A FEW CUTS BEFORE YOU MAKE “A MONEY CUT”. If you practice with a Bevel Mirror Strip, you can cut 2″ off at a time. Any less will be hard to break and will often make flares on the end of the Mirror Strip. (note: how to cut glass, how to cut mirror, how to cut beveled mirror strips, all fall under the same

question, HOW TO CUT GLASS, OR HOW TO CUT MIRROR. It is all glass. is done on the face side and the procedure is the same as cutting glass. glass mirror is the same) CUTTING BEVEL MIRROR STRIPS: “SQUARE CUTS” We will start here as if you have already measured your walls (or mirror for frame) and have the SIZE you need the bevel strips to be. 1. Put the Mirror Strip on a flat surface (preferably a thin carpeted table) and measure from one end to the length that you need to cut AND MARK ITIt is best to make one “thin” mark. You will want to split that mark with your cutter when you cut. 2. Put the Speed Square up on the Mirror Strip, now put your cutter on the middle of the mark that you made, then slide your Square over to touch your cutter. Note: Your Speed Square will be approximately 3/32″ from the mark you made. That is due as to where the wheel is on the cutter and the edge of the cutter. Having the lip on the square up against the

Mirror Strip will guide you through a straight and square cut. 3. Gently (without pressure) roll the cutter slowly away from you to the far side of the Mirror Strip, and when you feel the cutter rolling off the far edge of the Mirror Strip, roll the cutter back to you until it is on the very top edge of the Mirror Strip (this is the starting position of making a scribe). 4. NOW, apply pressure on the cutter (also pressure against the square) and roll it toward you all the way until it comes off the Mirror Strip. Be sure to keep your cutter up against the square. This should have made a scribe on the Mirror Strip. 5. Put a round wooden pencil under the Mirror Strip exactly under the scribe. Use a pencil that is longer than the width of the mirror so that it reaches under 6. Apply pressure with both hands to the top of the Mirror Strip evenly away from the scribe on both sides (at least 2″ away from scribe). With the pencil under the Mirror Strip this will snap the Mirror Strip where
1. Take the 220 grit Sandpaper and sand both ends, front and back. If you have the Mirror Strip laying on the table with one end hanging off the table edge (appx. 2″ or 3″) make the motion of your sanding go down. Flip the Mirror Strip over and sand the back side with your sanding motionIf you flip the mirror and have the mirror back on top, you have toIf your sanding motion goes up, it will cause a chipping effect onSame for the top side of Mirror Strip. Going in the wrong direction will cause little chips on the strip that will shine in the light and leave an unwanted look on your mirror. (A) If you are putting your Mirror Strips directly on a wall (sheet rock or panel) you are now ready to put Mirror Mastic on the back of the Mirror Strip to stick it 1a. Apply a “Dab” of Mirror Mastic about the size of a quarter and appx. We usually go with Four Dabs on short strips and on long strips we Dab about 12″ apart for the length of the strip.

Then (with Level if required) line the Mirror Strip up where you are mounting it to the wall and press it on. put the pressure you use at the point where you Dabed the Mirror Mastic. You need to press in until the strip is about 1/8″ from the wall. Note: This is for mounting full length Mirror Strips that go down to rest on the (B) If you are putting your Mirror Strips on a Mirror as a frame, you are now ready to put Two Way Tape and Silicone on the Mirror Strip to stick it to the Mirror. 1a. Cut the Two Way Tape 2″ long and apply side ways to the back of the strip. We apply five pieces of tape to small strips or about 10″ apart on long strips. Pull off the paper from the Two Way Tape then apply small spots of Silicone between each piece of tape your have applied. 2a. You have to line up exactly where you are going to stick the Mirror Strip toOnce you place the Mirror Strip on the mirror, you will not be able to move it.