Corner Window Curtain Rods Home Depot

UNDERSTANDING CURTAIN ROD OPTIONS FOR YOUR HOME Tension rods fit in the window frame and support lightweight curtains. Double rods can be used to pair sheer and blackout curtains for light filtration. Traverse rods allow you to easily open and close sliding door curtains using a track system. Single rods offer a simple look and can be used to layer curtains over blinds or shades. Othello Telescoping Curtain Rod Kit 80 - 144 in. Motorized Center-Open Remote Control Telescoping Drapery Rod Kit in Nickel 68 - 120 in. Side-Open Remote Control Telescoping Drapery Rod Kit in Bronze 48 in. - 84 in. Curtain Rod Kit in Satin Nickel with Ball Finial 28 in. - 48 in. Cocoa Telescoping Double Curtain Rod Kit with Theo FinialCenter-Open Remote Control Telescoping Drapery Rod Kit in Motorized Bronze 36 in. - 72 in. 1 in. Antique Bronze Urn Double Rod Set 8 ft. Smooth 1-3/8 in. Wood Pole in White 48 in. - 86 in. 5/8 in. Bell Double Rod Set in Vintage Bronze

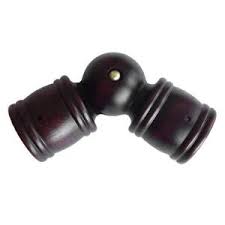
Curtain Rod Kit in Oil Rubbed Bronze with Square Finial 72 in. - 144 in. 1 in. Birdcage Rod Set in Oil Rubbed BronzeClassic Ball Rod Set in Soft NickelDoorknob Rod Set in Antique Pewter 120 in. - 170 in. 1 in. Supreme Double Curtain Rod Set in Light GoldMarble Ball Rod Set in Oil Rubbed BronzeSquare Rod Set in Oil Rubbed BronzeShell Urn Rod Set in Bronze 8 ft. Reeded 1-3/8 in. Wood Pole in Antique MahoganyClassic Ball Rod Set in Oil Rubbed Bronze 66 in. - 120 in. Curtain Rod Kit in Brushed Nickel with Crackle Glass Sphere FinialClassic Square Finial Curtain Rod Kit in Oil Rubbed Bronze 84 in. - 156 in. 2-1/2 in. Wide Pocket Curtain RodThese DIY curtain rods are made from galvanized pipe, so they have a cool, industrial-chic look to them. And with the gold spray painted finish, they’re also quite glam. Monica Benavidez, the creative DIYer who writes Monica Wants It!, came up with this project using pipe for our series here on The Home Depot Blog DIY Challenge: Pipe.
We asked Monica and several other impressively talented crafters and bloggers to come up with ingenious DIY projects that use pipe as an ingredient. It could be just about any kind of pipe: galvanized pipe, PVC pipe or, as in this case, copper pipe.
Window Cleaning Bayside Just follow the steps in this tutorial to make your own DIY curtain rods from pipe.
Bichon Poo Puppies For Sale In Ohio I love these Home Depot challenges because they usually motivate (and inspire) me to start something I’ve been thinking about.
Hp Laptop Keyboard Cover SiliconeI’ve been slowly revamping a bedroom to serve as my home office and craft space, and there’s a window in there that lets in light that floods the room…which is good most of the time.

However, sometimes I want to filter the light or block it out a tad to focus or do some blogging. I’ve had my heart set on a brass/gold curtain rod, but boy are they expensive! The ones I fell in love with were over $200 and had a bit of an industrial feel that is the perfect balance to the feminine black, white, gold and pink vibe I have going on. Yes, this is the same color palette I used during the Harvest Style Challenge. With a little creativity, pipes and gold spray paint, I was able to create some DIY stylish curtain rods that are unique and look simply gorgeous in my home office. I’ll walk you through the steps. This is a project anyone can accomplish in an afternoon, and with the myriad of spray paint colors available at The Home Depot, the possibilities are truly endless. I debated on whether to assemble the curtain rod and then spray paint, but I ended up spray painting the pieces individually and it worked out fabulously. Use Goo Gone to remove any and all grease from the pipes and accessories.

I only had to do this to the 60 in. pipe, but this step is critical to success because you want the primer to adhere to the pipe to provide a solid, smooth foundation for the gold spray paint. After you remove all the grease, make sure to dry it off with a shop rag. Apply a coat of Zinsser spray primer. This was my first time using the spray paint version, and oh my gosh y’all, it is fabulous! It truly does work with just one coat. A bit of advice: use short bursts from about 8-10 in. away, and shake the can every 20 seconds or so for flawless coverage. Let it dry half an hour. After the primer coat has dried for half an hour, it’s time to spray a coat of gold (or whatever other color you’d like) on. I did three light coats of gold to ensure a durable finish. Optional: If you want to tone down the gold/brass, or if you plan on using curtains with grommets or using curtain rings, I’d suggest using a clear gloss spray paint sealer to seal the finish.

This will help your paint not chip off from the back and forth motions of closing your curtains. Fair warning though, it does dull the shiny part of the gold finish. I bought the sealer, but when I saw that my shiny, metallic gold was dulled when I used it, I chose to not use it after all. NOTE: Steps 4-6 are really a two-person job to ensure a level, accurate installation, especially on a wide window. I let my pipe curtain rod pieces dry about an hour before moving on ahead to the actual installation. We (my darling and handy husband and I) fully assembled the curtain rod and measured it. Although I bought a 60 in. pipe, the overall width was about 65 in. due to the elbows and flanges. From there we made pencil marks on the wall at the overall height of the curtain rod (I chose 83 in. so my 84 in. curtains would skim the floor), and we also marked where the holes would be drilled to attach the flanges to the wall on the left and right side. The order for the assembly is (from left to right) flange > nipple > elbow > pipe > elbow > nipple > flange.

Drill pilot holes for the drywall anchors and insert the anchors. Place the flange over the holes and screw into place. Attach a nipple and elbow into the left flange. Install the right hand side flange. Screw one end of the pipe into the left elbow and slide your curtains on. One person holds that in place while the other connects the elbow and nipple on the right hand side and screws it into the right flange.Now you can sit back and enjoy your hard work. I love, love, love my DIY pipe curtain rod. It’s glamorous, unique and a bit industrial in this very girly office of mine. The gold really pops thanks to the bold floral curtains I chose for the space. I’m using lots of gold polka dots with black and white stripes, so this pattern addition really makes a statement and shakes things up. In the window reflection above, you get a glimpse of my super stunning Maria Theresa chandelier, which is also from The Home Depot. Truth be told, there are three of these chandeliers in my house– one in the office and two in my dining room.

I’ll let you in on a little secret…I am so head over heels for my new DIY pipe curtain rod that I keep going into the office just to look up and gaze at it. I’m always so proud when I turn an idea into a DIY project and it turns out better than I had hoped. I still have a bit more work to do on my office, so if you want to end up seeing the full reveal and tons more tutorials (the desk, the console table, the bench and the wall artwork are all DIY’d), you can stay tuned to my blog. Ok, ok, here’s one more sneak peek. Hope this post inspires you to jump start on a project you’ve had roaming in your head…you can do it! Monica Benavidez lives in Beeville, Texas and is the creative mind behind Monica Wants It! She says she started her blog as a way to share with the world the random things she wanted to buy, but it’s evolved into a terrific lifestyle blog where she chronicles her adventures in DIY, recipes, and life. Check out more of our DIY Challenge: Pipe series and our simple DIY projects here on The Home Depot Blog, and follow our Projects Using Pipe board on Pinterest for more fun projects using galvanized pipe.