Curtains Iron Hem

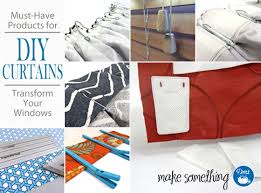
DIY Home Decorating: Must-Have Curtain-Making Products We guarantee you’ll be thrilled. And maybe you’ll be surprised, too. Because there are so many great Dritz® products for DIY curtain making, it’s hard to be aware of them all. So let us introduce you to a few of our favorites. And once you start using them, you’ll discover they’re indispensable, too. DIY curtains have never been easier, or looked so good! Must-have DIY curtain product: Dritz® drapery hem gauge. It’s a fan favorite! Each time we share information about this item socially, we get lots of admirers. Many who love it – many others who’ve never seen it. The drapery hem gauge is extra wide and deep for measuring and pressing hems on curtains. Many folks are surprised to know that you iron right over the gauge to press in the hem! Must-have DIY curtain product: Dritz® measuring clips. These clips do double duty by measuring and holding the hems in place while stitching.

They have inch and centimeter markings, and grips to secure fabric between top and bottom of hem. Must-have DIY curtain product: Dritz® drapery weights. These gems keep your curtain panels hanging straight. Simply hand or machine stitch the weights into the side hems at the bottom of premade curtain panels. The weights are covered in a nonwoven fabric with a tab for stitching. Tip: If you’re making your own curtains, place the weight inside of the side hem during construction – it will be hidden! Must-have DIY curtain products: Dritz® pleater hooks. Our pleater hooks are for use with a multi-pocket pleater tape. After the tape is stitched to the top of the curtain panel, the “fingers” of the hook are inserted into specially positioned pockets in the tape. When the “fingers” are completely pushed into the pockets, a pinch pleat is formed. The long neck version is for decorator rods and allows the rod and rings to be visible. With the short neck version, for traverse and ceiling-mount rods, the rod is concealed by the curtain panel.

Must-have DIY curtain product: Dritz® slip-on hooks. You can use these handy hooks to hang any curtain panel with an open bottom header and pleats. They have a short neck hook for hiding the rod. Must-have DIY curtain product: Dritz® pin-on hooks. These hooks are packed with versatility. They can be used with flat or shirred panels, as well as any curtain panel with an open bottom header and pleats. Position them as desired on the curtain’s header – just poke the pin into the header! Have a sheer panel or fabric? Try out the lightweight pin-on hooks – they work the same way! Must-have DIY curtain products: Dritz® drapery tapes. These sheer tapes make virtually any piece of fabric or panel easy to hang. You can attach them to store bought panels or to custom made curtain panels. Just stitch the tape along the top of the panel. Bonus: there are different types of tapes to choose from – each gives you a different look … Must-have DIY curtain product: Dritz® rod loop tape.
This tape has hidden tabs on the back of the tape; you’ll slide your curtain rod right through the tabs. This tape creates soft even folds when the panel or fabric is hung on a rod. Must-have DIY curtain product: Dritz® clip ring tape. This tape is used with clip rings to hang panels from the curtain rod. Small bands in the back of the tape allow the clips to be hidden from view. Must-have DIY curtain products: Dritz® wooden cord pulls.
Bichon Frise Puppies For Sale North Wales Our decorative wooden cord pulls add the finishing touch to blinds and shades.
House For Sale In St-Leonard QuebecKnot cord ends together and pull slides down over knots so they are hidden inside of pull.
Cocker Spaniel Cross Puppies For Sale Scotland
Choose white, light brown, or dark brown finishes. Did you discover something new? Check out our full range of Dritz® Home window products and related tutorials – we’ve got some good information and education for you! Want to see some of these tools in action? Check out our Dritz® YouTube channel – we’ve got videos featuring many of the products above. With the right tools and supplies you really can transform your windows easily and inexpensively. This entry was posted in sewing product info and tagged 30min or less, curtains, DIY home decorating. Let us know what you thinkOne of the first home-related DIY projects I ever attempted was to make all the curtains on the first floor of our house. I simply could not find a curtain style nor pattern that I really loved within my price range (which was, preferably, under $100 total), and was convinced curtains should be simple enough to make on my own. However, at the time, I wasn't the most talented with a sewing machine.

Sure, I could do a simple hem here or a circle skirt there, but wasn't confident in my abilities to make something that would make a visual impact in our home for years to come. Also, setting up the sewing machine is a lot of work and, after having just moved in to our new house, I was feeling pretty burnt out (which is the nice way to say I was actually feeling very, very lazy). However, after doing some research I learned how to make custom curtains without dealing with a sewing machine. The icing on the cake was that, in all, making panel curtains for four windows in my living and dining rooms cost only $60 total! Super style and a super-low cost. And, my friends, it was so, so easy. If you're just starting out in home-decor DIY, this is a great project to tackle first. And here's how to do it yourself: 1. Measure your windows to calculate how much fabric you'll need. Make sure you account for how high you want your curtains to hang above the window and how much, if any, "pooling" you'd like yor curtains to have if falling to the floor.

2. Pick out and buy/order your fabric! This is obviously the most fun part of the project. The reason I wanted to make my own curtains was so I could use whatever fun fabric I wanted! , which has an incredible variety of designer fabrics (they also always have some kind of sale going on, too). When ordering your fabric, make sure you order at least a half yard more than the measurement you calculated for each window, just in case. 3. Cut your fabric to size, based on your window measurements. Don't worry about a frayed edge here or there; you'll take care of that next. 4. Begin the "hemming" process. Take the edges of each curtain panel and fold them back about a half inch on each side, pinning everything in place. Once pinned, iron the crease to a crisp edge. Then, lay a strip of hem tape inside the folded "seam" along these edges and iron down so the hem tape fuses the fabric together (removing the pins from the fabric before ironing, of course). Continue around each edge of each panel.