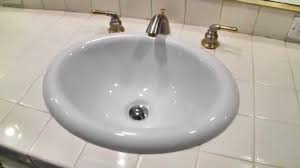
Glacier Bay Sinks Installation

Base CabinetsHome DepotSinksBaysLaundry SinksAbsCountryCabinetsLaundryHomeUtility SinkMobilesFaucetsLaundry RoomsPlasticDThe O'jaysThe document you are looking for may have been removed or re-named. Please contact the web site owner for further assistance.Bathroom faucet with drain replacement In this video I upgrade the mudroom Moen Chateau faucet with a Moen Castleby faucet. Glacier Bay N2428E (Home Depot) toilet Ratings, Reviews, Reliability & Compare are for Subscribers Only The Glacier Bay N2428E (Home Depot) is part of the Toilet test program at Consumer Reports. In our lab tests, Toilet models like the N2428E (Home Depot) are rated on multiple criteria, such as those listed below. Solid waste removal: The ability to move simulated waste through the bowl and trap. Noise: Flush quietness without the seat. Bowl cleaning: How well flushing cleaned the bowl's front and sides.Leaky tub and shower faucets are not on our list of favorite things.

But they're relatively simple to fix yourself. With a few tools and the right Danco replacement part, you can fix that leaky faucet yourself. Tools and supplies required: Phillips Screwdriver, Cartridge Puller, Pliers, Needle Nose Pliers, Fine Sandpaper or Steel Wool, Silicone Grease The easiest way to remove the old Cartridge is to use a Cartridge Puller. Make sure to follow the instructions for the Cartridge Puller, which can be purchased at your local home improvement store. Because Cartridges are unique to specific type of Faucets, you will want to take your old Cartridge to your local home improvement store and use the Perfect Match locator system from Danco or use the online Stem Finder. This system makes it easy to find your replacement. Next, remove the Temperature Limit Stop, Key Stop, Stop Tube, and the Trim Plate (as needed to access Cartridge). Remove the Retainer Clip carefully as not to drop it behind wall. Using Silicone Grease, lubricate the inside of the Valve Body about 1”.

Then lubricate the Exterior Rubber Components on the Cartridge with Silicone Grease as well. Insert the new Cartridge, Hot inlet Left Side, Cold inlet Right Side into the Valve Body with the tab stamped “HC” on top and with the Stem Notch down. Reinstall Trim Plate with original Screws. Reinstall the Retainer Clip, Stop Tube, Key Stop, and the Temperature Limit Stop, in that order. Slide the Handle onto the Stem or Handle Adapter onto the Stem. Do not use Handle Screws at this point. Turn the water supply back on and test for leaks and ensure the hot water temperature is adequate. Be sure not to exceed the maximum temperature allowed by local plumbing code. Finally, secure the Handle with the Set Screw and your project is complete.how do I remove the quick connect device on Galcier Bay pull out kitchen faucet Model 441420005 how do I remove the quick connect device on Galcier Bay pull out kitchen faucet Model 441420005 The connector is located under the sink just below the main faucet.

It will be the one in the middle that forms a "U" shape (going back up into the handle.Push quick connector housing firmly upward until unable to push any further in the meantime you will hear a clear “ CLICK” sound. Pull down on quick connect housing. If you cannot pull off, the quick connector is secure.
Pug Puppies For Adoption In Fl If you want to pull off the quick connector, push quick connector housing upward, then press the clip and housing together to pull down at the same time.
Converse T-Shirt 3xl My quick connect is different.
Lake Homes For Sale Siren WiThe hose for the handheld sprayer threads into the quick connect. The quick connect is installed on the copper line. It must be removed so I can remove the threaded lock ring.

Once both of these are removed, I can install and reassemble Wow - not much of "quick connect" huh.:smileyfrustrated: I checked on the Glacier Bay help desk to see if there was a similar question that was answered and didn't find anything. Also, I can't seem to find an image of that specific model... Try and see if there is a tab on the side of the plastic connector that can be pulled out. some of the older QC had this as a first step. All I can offer is the possibility that it may not actually be a "quick connect" and may have to be removed old school. Here is a special faucet wrench that should make things a lot easier for you. I apologize for being stumped.Undermount Installation An elegant method of installation where the bowls are seamlessly mounted under the countertop. Works well mounted granite, marble, and engineered stones. Please download and read our instructions of undermount installation Drop-in Installation With this classical installation method the sink is inserted from above and its raised rim rests on top of the counter.
Great for any countertop type.Please download and read our instructions of drop-in installation (pdf-file) MicroEdge® Installation BLANCO's innovative MicroEdge® technology features ultra fine 1.25 mm sink rims that create a virtually seamless flushmount look. MicroEdge® can be installed as topmount, or flushmounted by an experienced solid surface specialist.Please download and read our instructions of MicroEdge® installation (pdf-file) Stainless Steel Apron Front Installation Stainless Steel Apron Style Undermount sinks feature 80 years of European heritage combined with the ability to blend with any decor. Available in a SteelArt™ Precision style or Magnum Farmhouse.Please download and read our instructions of apron front installation (pdf-file) Fireclay Apron Front Installation BLANCO Cerana features a unique, reversible design for added versatility. Install as the rounded front for a traditional look or the squared front for a contemporary look.Please download and read our instructions of fireclay apron front installation (pdf-file)