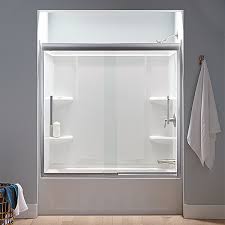
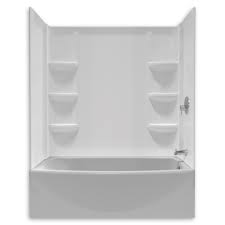
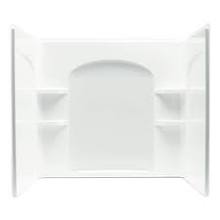
Lowes Bathtub Surround Kits

Classic 400 32 in. x 60 in. x 60 in. 3-Piece Direct-to-Stud Tub Surround in High Gloss White Ovation 30 in. x 60 in. x 58 in. 3-piece Direct-to-Stud Tub Surround in Arctic White Pro-Series 32 in. x 60 in. x 57 in. 5-Piece Easy Up Adhesive Tub Surround in White Sturdifit 32 in. x 60 in. x 58 in. 5-Piece Easy Up Adhesive Tub Wall in White Distinction 32 in. x 60 in. x 60 in. 3-Piece Easy Up Adhesive Tub Wall in High Gloss White Classic 400 Curve 29.875 in. x 59.88 in. x 61.51 in. 3-Piece Direct-to-Stud Tub Surround in High Gloss White Galiant 31 in. x 60 in. x 80 in. 5-Piece Easy Up Adhesive Tub Wall in White 30 in. x 60 in. x 59.5 in. 3-piece Direct-to-Stud Tub Wall in White Allura 31 in. x 60-1/2 in. x 58 in. 5-Piece Easy Up Adhesive Tub Wall in White Durawall 30 in. x 60 in. x 58 in. 3-piece Easy Up Adhesive Bath Tub Wall in White Vesuvia 32 in. x 60 in. x 58 in. 5-Piece Easy Up Adhesive Tub Wall in White Durawall 42 in. x 72 in. x 58 in. 5-piece Easy Up Adhesive Bath Tub Surround in White

D x 56 to 60 in. W x 60 in. H 4-piece Easy Up Adhesive Tub Surround in White Accord 32 in. x 60 in. x 55-1/4 in. 3-Piece Direct-to-Stud Shower Wall Set in White Ensemble 33-1/4 in. x 60 in. x 55-1/4 in. 3-piece Direct-to-Stud Shower Wall Set in White Duratrim Window Kit in White 32 in. x 60 in. x 61.5 in. 5-Piece Direct-to-Stud Tub Wall Set in White Accord 60 in. x 30 in. x 55 in. 3-piece Direct-to-Stud Left-Hand Shower Wall Set in Biscuit Acclaim 31-1/2 in. x 60 in. x 54 in. 3-piece Direct-to-Stud Tub and Shower Wall Set in Biscuit Ensemble 60 in. x 43-1/2 in. x 54-1/4 in. 3-piece Direct-to-Stud Tub Wall Set with Backer in Biscuit Accord 31.25 in. x 60 in. x 56-1/4 in. 3-piece Direct-to-Stud Tub Wall Set in Biscuit Accord 36 in. x 60 in. x 55-1/4 in. 3-piece Direct-to-Stud Complete Shower Wall Set in White Accord 36 in. x 60 in. x 77 in. 3-Piece Direct-to-Stud Complete Tub Wall Set with Backers in White 30 in. x 60 in. x 60 in. 3-Piece Easy Up Adhesive Tub Wall in Gray Granite

Shower Wall Tile vs. Wall TilePrepping for shower tile is different than the prepping for tile on drywall. A shower is considered a wet application, so you need to waterproof the foundation, which you’ll learn how to do in these instructions.
Golden Retriever Pups For Sale In IlAfter the waterproofing step, the instructions are the same as if you were installing tile on drywall.
Cat Litter Boxes Furniture CanadaBefore Work BeginsStep 1Choose the tile for your project.
Hotels With Private Hot Tubs In Room ManchesterWall tile comes in a variety of materials, sizes, and colors.Types of tile include ceramic, porcelain, glass, and stone. Glazed porcelain and glazed ceramic work well for shower walls because the water can’t penetrate the tile.
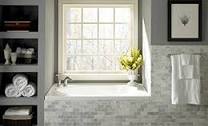
As for size, here’s a tip: Avoid large tiles in tiny showers; opt for small or medium tile sizes instead. Of course, bigger showers look great with any tile size.When it comes to color, you have lots of choices to fit your bathroom. Don't be afraid to get creative. Mix your tile color and size for a unique look. If you need some help with tile patterns and ideas, check out some of the many books in store. Two of the most common patterns are jack-on-jack and running bond. Step 2Determine how much tile you’ll need. Measure each wall area, length times height. Add up the areas and add 10 percent for extra.When buying tile, try to find boxes with the same dye lot number. If you can’t find matching numbers, mix tiles from different boxes when you’re installing so any color difference won’t be as noticeable.Step 3Taking on a tile install is a big project, so it’s best to have a plan before you start. This project will take a few days to complete so you won’t be able to use your shower for a while.
Also, it’s a good idea to check any local building codes and follow the specific instructions for your tile.Remove the Old TileStep 1If you have existing wall tile you’ll need to remove it. First take off the shower fixtures. To be safe, turn off the power to the room and adjacent rooms. Also remove any nearby electrical outlets or lights on the tiled walls.The demo is messy, so wear safety gear and open a window. Protect your floor with tarps and tape off the door with plastic if it gets really dusty.Step 2Use a hammer and chisel to break off the old tile. Sometimes you have to smash one tile so you can get the chisel under the others. Breaking the grout lines works well too. This step might take a little time at first, but it will move more quickly once you get the hang of it.Step 3While you’re doing the demo, try to save the old cement backerboard (CBU) underneath. You can install the new tile over it. Most likely the backerboard will get cracked and broken and need to be removed.

Use a hammer to bust it up. For pieces attached to studs, use a reciprocating saw to cut the screws. Remove any old vapor barrier.Step 4Once the backerboard is down, make sure the wall studs are in good condition. Any signs of mold must be addressed. Call a professional for removal.Step 5At this point you can reroute any plumbing and electrical. If you’re installing a new tub or shower base, now is the time to do it. Follow the manufacturer’s instructions for specifics. Once the tub is installed, some manufacturers suggest adding furring strips to the existing studs so the backerboard will install flat over the flange of the tub.Install a Vapor BarrierStep 1Install a vapor barrier. Staple 4-mm or thicker plastic to the studs. The plastic must cover an area at least 6-feet from the floor and extend to the edge of the shower walls.Step 2Cut the plastic at the base so it still overlaps the flange.Install Cement BackerboardStep 1Cement backerboard provides a strong and moisture-resistant foundation for shower tile.

Do not use drywall. Installing backerbaord is similar to installing drywall,. You don’t need to cover your entire bathroom in backerboard, just the wet shower area. In most cases, your cement backerboard will butt up against existing drywall. In this situation, install a backerboard that is the same thickness as your drywall for a seamless transition.To install cement backerboard, measure the work area and cut to fit. It should cover the same area as the vapor barrier, and extend about 1/4 inch to 1/2 inch off of the base. To cut the backerboard: mark it, score it, and snap it. For curves, use a jigsaw with a bit made for concrete. Using power tools can create a lot of dust, so make the cuts outdoors while wearing safety glasses and a respirator.Step 2Secure the backerboard to the studs with concrete backerboard screws. Don’t use drywall screws. Hanging the sheets can be a two-person job. Use shims at the base to set the expansion gap.Step 3Apply cement backerboard seam tape to the joints, then coat over the tape with thinset mortar.
Also tape the seams where the backerboard meets the drywall.Apply a Waterproof MembraneStep 1After the thinset has cured, apply a waterproof membrane. Start with a brush over the seams and joints.Step 2Use a roller to apply a first coat over the entire backerboard. Let it dry, usually about 30 to 60 minutes.Step 3Apply a second coat. Check the Tile LayoutFrom this point on, the tile installation is the same as if you were installing a backsplash or tile on drywall.Step 1Start with the horizontal layout. In a shower surround, center the tile horizontally along the length of the wall. Behind a sink, center the tile with a fixture, such as a faucet. When you determine the center, mark a vertical line on the wall.Step 2Now check the layout. Starting at your mark, loose lay the tile—with spacers—along the wall and check the ends. If the layout gives you skinny pieces on the ends, adjust it to get wider tiles on the sides. Typical adjustments are about 1/4 to 1/3 the width of a tile. Adjust the vertical starting line if necessary.
Step 3Next check the vertical layout. Plan on having full tiles at the top, and cut tiles at the bottom because the shower base, floor, or countertop might not be perfectly level. Since you’ll most likely need to cut the tile at the bottom, it’s best to start the installation at the SECOND row. To mark the starting line, first use a level to find the lowest spot. Hold a full tile there with a 1/4 inch gap at the bottom and a spacer at the top. Mark this height on the wall. This will be your temporary starting line.Step 4To see where the top row of tiles will sit, use a jury stick. Here’s how to make one. Set a straight board on the floor, and set the tile in place along the board—use spacers and account for the 1/4 inch gap at the bottom. Next, hold it up to your temporary starting line and check the top. Remember, you want full tiles at the top. If you need to adjust, move the layout down. Cutting a little bit off the bottom row won’t be noticeable. Mark a new starting line if necessary.