Hardwood Flooring Diagonal Installation
Installing flooring diagonally helps integrate rooms with irregular dimensions. Installing your flooring diagonally may make a strong design statement, and it may even make your floor a conversation piece, but it tests the skill of any flooring installer. Diagonal installations call for careful measurements before you even start laying the flooring. They also require precision angle cuts and waste more wood. Moreover, you have to start a diagonal installation in the middle of the floor. If you're installing hardwood, that means changing tongue direction. Blind-Nailing the First Row When installing flooring diagonally, you can't install the first row along a wall. Instead, you have to snap a line down the middle of the floor and use it as a guide. If you're installing hardwood, nailing the first row may be problematic when it's in such a prominent location, because top nails are immediately visible. Installers usually get around this by bracing the row with blocks, nailing through their tongues -- or blind-nailing -- and removing the braces.
It's all too easy for the boards to move and throw off the alignment of the entire floor during this procedure, however, and it requires extra care. Changing Tongue Direction When you begin a hardwood installation in the middle of the floor, you need two first rows. The tongues of each row must face in opposite directions to give you something to which to attach the subsequent rows. Arranging this requires a trick: You have to cut a false tongue to fit into the grooves between the boards in these rows. That's an extra procedure, and it may be challenging for a table-saw novice. If it's the wrong width or thickness, it either fails to hold the boards down, or makes a gap between them. Making Angled Cuts In principle, when installing plank or tile flooring, you can make a template for the angled cuts you need to make at the beginning and end of each row. It works well as long as the walls are straight, but if they aren't, you'll find a progressively wider gap between each successive board or tile and the wall.

The only way around this is to measure each cut with a scribe or adjustable bevel, which adds considerably to the time the installation takes. This issue is especially important when you're installing ceramic tiles and you don't plan to cover the edges of the floor with baseboard. Material Waste When you're installing flooring parallel to a wall, you usually can use the off-cut from the end of a row to begin another row. This isn't true in a diagonal installation, because the angle of the off-cut isn't correct. You have to cut a small piece off of it to get the proper angle, and you end up throwing that double-angled piece away. In a large installation, that amounts to a large number of cast-off pieces of wood, and when you figure wrong cuts and other mistakes, the waste can amount to 15 percent or more of the material you buy. : Which Direction to Install HardwoodExtreme How-To: Professional Tile Layout Photo Credits Jupiterimages/Creatas/Getty Images Suggest a CorrectionChoosing which direction to install wood floors is often a confusing choice for many.
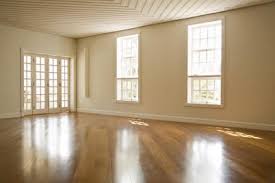
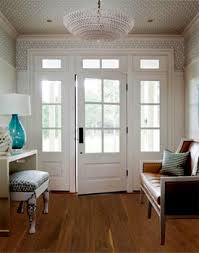
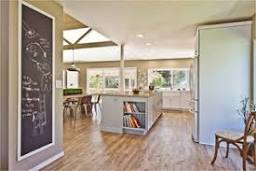
In a nutshell, the preference calls for running the flooring front to back as you enter the home. By way of explanation, as you walk into the foyer, the floor will be installed perpendicular to the front door threshold. The example shown is our Country Style random width Walnut. If the front entrance is rarely used and the main focal point becomes another point of entry it may be better to go perpendicular from there.
Red Boston Terriers For Sale In Houston Texas Floor Joist Direction Can Mess It All Up
Bowfishing Reels For Cheap More modern homes have a floor joist system and a subfloor.
Windows 7 Games BackgammonExperts have always been aware of the effect floor joist direction can have on the performance of solid 3/4 inch hardwood floors.

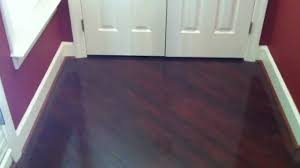
The preference has always been installing perpendicular to the joists, as it provides stronger support for the floor going over it. Installing with the floor joist system or parallel, can lead to sagging or board separation. The Solution To Fix The Mess Up For years most construction has been using common 5/8 or 3/4" sub flooring over joist systems. In some cases thinner material may have been used. None of these are suitable for a problem free floor installation running parallel to the joists. Sure in some cases it may work, but others not. Why take chances considering the price of wood floors today? Fixing the underlying problem is as simple as adding another layer of plywood to the existing subfloor, providing your floor joist spacing is in a normal range. Many suggest 3/8" plywood to be used if you prefer running with the joists. When installing, run the new subfloor material perpendicular to the existing while overlapping older subfloor sheets(seams). Applications ordinarily call for gluing with a construction adhesive, while screwing or using ring shank nails secured into the floor joists through the existing subfloor.
Older Plank Sub Flooring Older homes with thicker solid plank flooring were installed on a diagonal. Any new hardwood installation does not require additional sub flooring unless the preferred direction is the same as the old plank subfloor. Other situations where attention should be taken into account would be if thinner sub flooring was used, or settling of the home had taken place with visible peaks and valleys across the subfloor. Hardwood on concrete does not follow any of the above. There are no structural subfloor components that can effect the performance of the hardwood floor except prestressed or precast concrete. These type of subfloors have been constructed off site. Consult with experienced professionals to evaluate these systems and what may or may not be needed in your case. Experienced installers have a better grasp on which direction the floor should run. A little off subject, but if you have a lightweight concrete subfloor often called gypcrete, some hardwood floors can only be installed by the floating method.

Direction can also play a role by opening up areas that looked smaller. Straight Laid Or Diagonal Floor? Diagonal floor installations can be installed on both plywood (minimum sub floor requirements) and concrete subfloors. Diagonal installations are not very common because few salespeople bring up the suggestion, or the contractor doesn't want to handle it as the time involved increases. In my own personal opinion, diagonal installations at a 45º angle will make your home stand out in the neighborhood. It's not uncommon after finishing up a job, neighbors come by to casually snoop and ask themselves.."why didn't we do that?" Expect higher installation rates and material waste when installing on a diagonal. How To Install Hardwood on A Diagonal Opinions on how to install a diagonal hardwood floor may vary depending on who you talk to. First off, what is a diagonal? For the most part, diagonal installations show the floor layout on a 45 degree angle, but that does not mean you’re held to those dimensions only.
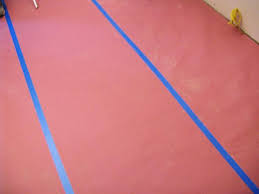
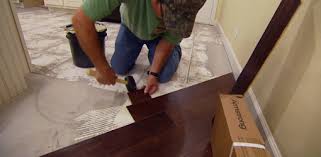
A few variations can really set off the appearance of your home. Take for example the installation shown further down the page. Instead of a standard 45 degree layout, or the bowling alley look, this homeowner sought a ten degree layout. I’ve found the best area to start is in a corner. The image on the right best illustrates this. Keep in mind our example is a glue down installation and the procedure may vary. Principally what I wanted to achieve was a good solid starting point. The smaller sections behind the first board are anchor points to keep the first board aligned. Other applications can include using a full length piece as a backer board for the start of the installation. Either method, they are held firm to the subfloor with concrete screws. No movement of the starter line area will occur, but keeping a watchful eye on the area is advised during the course of the first several rows. For the starting area there is no set method on how far out from the corner, but you may want to dry lay pieces in the area if you're not fond of small triangles in the corner.
In this example I simply took a three to four foot board, cut two outside 45 degree angles on the miter saw, placed it into the area finding a comfortable starting point where enough expansion space area was allowed. Diagonal installations have a tendency to bend at the perimeter because there is not enough backing to keep it aligned with the firmer larger areas. Bending can be slight, but over many rows can throw off the alignment into inches if you don't keep an eye on it. This is where wedges come into play. After every row or two is completed, insert the wedges against the wall or base. At all times keep an eye on your control line. More on control lines can be seen with our naildown pages as a reference. The Ten Degree Layout The ten degree angle layout is not for the timid. Patience is critical with this type of installation especially in keeping the proper amount of expansion space around the perimeter. Generally the biggest problem is keeping the same angled cut around the wall lines with so many individual pieces being used.

Standard chop saws cannot cut past 45 to 48 degrees without using a jig. For those interested, the easiest way to make these cuts is establishing a template with a two foot long scrap piece. Once the preferred angle is achieved simply create the template board to be used throughout the installation. As far as tools used to cut, any table saw will be the most efficient, but not the safest. Proceed with the utmost caution as blade binding with severe angles is commonplace. This often results in board kickback from the saw itself. A much safer tool to use is a jig saw but takes longer. The easiest way to install a ten degree angle (80 degrees at the other end) is to begin the flooring along the walls that represent the 80 degree angle. This way your final cut along the opposite wall will be easier to measure and cut.I have this long hallway. If I install the flooring front to back of the entry, it will look all chopped up in the hallway. What can I do?" It's not uncommon to have directional changes that offset the appearance, providing you have the proper sub floor.