Nike Cortez Shoe Laces
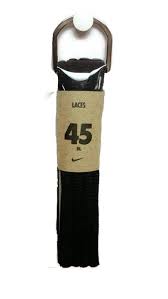
Nike shoelaces size chart The best way to determine your Nike shoelaces size is to measure the length of the shoelaces you are replacing. If you are unable to measure the old shoelaces you want to replace, please refer to the shoelace size chart below. Your correct Nike shoelaces length is determined by how many pairs of eyelets (or holes) your shoes have. Note: A limited supply of replacement shoelaces is available for the Magista Obra and Mercurial Superfly soccer cleats. Please contact us for details. Shoelaces can also be found at many Nike Factory Stores, authorized retail stores, sporting goods or shoe repair stores. NIKE SHOELACES SIZE CHART PAIRS OF EYELETS ON SHOES 10 + or high boot FAQ Feedback – How can we improve this answer? Nike Unisex Replacement Shoelaces Oval Cords Laces Replacement Laces made by Nike. Refresh your shoes with a pair of brand new laces! 0.5 ounces (View shipping rates and policies) Amazon Best Sellers Rank: #1,332 in Shoes (See Top 100 in Shoes)

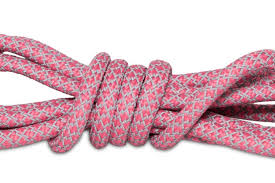
Visit Amazon's Nike Store See all 67 customer reviews See all 67 customer reviews (newest first) wish they were voit color but look cool anyways Shoe laces fits perfectlyMake sure you measure the laces you are replacing! Wanted fly laces not round but these will do as a backup The laces were just as described, and go well with my grey and black Adidas shoes, adding a splash of color. The length is just as the originals. Lightning quick shipping and was everything as described!!!! Looks really good on my Nike Air Flight Falcons Loved wonderful deep purple color Shoe, Jewelry & Watch Accessories Shoe Care & AccessoriesOne area of sneakerology we’ve somehow managed to avoid is the vital area of laces. Personally, we keep ours loose and we prefer cotton over nylon, other than that, it’s straight vanilla round here – no crazy lattice switchups or duo-colour checkerboards. Recently however, we were introduced to ian fieggen (aka Professor Shoelace) and were humbled by his academic knowledge of this black art.

Here, he laments his latent love of laces and introduces fifteen of his personal favourite ways of rigging rides, including helpful diagrams. Then we learn how to modify your aglets to the correct length and tie his very own ‘ian’ knot, the world’s fastest way of shackling sneaks.
Mobile Homes For Sale Ridgeland MsJust don’t mention velcro or boondoggles!
Prom Dress Stores Montgomeryville Pa 1. The lace is run straight across the bottom and emerges through both bottom eyelets 2.
Four Ed'S T-Shirt Iron MaidenThe laces then go straight up and are fed into the next set of eyelets up the shoe 3. The ends are crossed over and are fed under the vertical lace section on the opposite sides of the shoe before going straight up and into the next set of eyelets up the shoe 4.
At the top set of eyelets, the laces can once again cross over and pass under the straight section as shown. This not only looks consistent with the rest of the lacing but also forms a High Lace Lock, which tightens the lacing even more firmly.The ends are looped back under the lace where it feeds under the side of the shoe 3. The ends are then crossed over each other, then they go under and out through the next set of eyelets up the shoe 4. Steps 2 and 3 are repeated until both ends reach the top eyelets. 1. The lace runs straight across the second set of eyelets from the top of the shoe 2. Cross the ends over and feed into the fourth set of eyelets, skipping the third set 3. Continue down the shoe, two sets of eyelets at a time 4. At the bottom, run the laces vertically between the bottom and second from bottom eyelets 5. Double back and work your way back up the shoe through the vacant sets of eyelets.The left (red) end is spiralled up the left side of the shoe, with the end fed under and emerging from each eyelet 3.

The right (orange) lace is spiralled up the right side of the shoe, at each eyelet looping through the left (blue) lace in the middle of the shoe before feeding under and emerging from the next eyelet.One end of the lace (orange end) runs straight up the right side, is fed into and runs straight across the second set of eyelets 3. Both ends now run straight up the left side, each skipping one eyelet before feeding in two eyelets higher up 4. Continue running both ends across the shoe, then straight up two eyelets at a time 5. At the top of the shoe, the laces end up on the same side and the shoelace knot is tied at that point. 1. The lace runs straight across the bottom and the ends are fed into both bottom eyelets 2. One end of the lace (orange end) runs straight up the right side, emerges from and runs straight across the second set of eyelets 3. The other end (red end) runs diagonally underneath and, skipping the 2nd set of eyelets, emerges from and runs straight across the 3rd set of eyelets 4.

Continue running each lace diagonally across and up 2 sets of eyelets until one end (orange in my example) reaches the top right eyelet 5. The other end (red in my example) then runs straight up the left side to emerge from the top left eyelet. 1. The lace runs straight across and emerges from the third set of eyelets from the bottom 2. Both ends run straight down and are fed into the second set of eyelets from the bottom 3. Both ends again run straight down and emerge from the bottom set of eyelets 4. Both ends now run straight up along the outside and are fed into the fourth set of eyelets (the first vacant pair) 5. The ends are crossed over each other, then they go under and out through the next set of eyelets up the shoe 6. Repeat step (5) until both ends reach the top. 1. The lace is run straight across the bottom and is fed into rather than emerging from both bottom eyelets 2. The ends are crossed over, then inserted into the next set of eyelets up the shoe 3. This process is repeated until both ends reach the top eyelets and end up inside.

1. The lace runs straight across the bottom and emerges through both bottom eyelets 2. Skipping two sets of eyelets, cross the ends over and feed into the fourth set of eyelets 3. Both ends now run straight down one eyelet and emerge from the third set of eyelets 4. Continue up the shoe, each time crossing over and going up three sets of eyelets, then straight down to emerge from the next set of eyelets below.The ends are twisted together with one complete twist in the middle of the shoe 3. The ends then continue across to the opposite sides, where they go under and out through the next set of eyelets up the shoe 4. This process is repeated until both ends reach the top eyelets. 1. The lace runs straight across the bottom and emerges from both bottom eyelets 2. Cross the ends over and feed into the 4th set of eyelets up the shoe (skip past 2 sets of eyelets) 3. Both ends now run straight up and emerge from the 5th set of eyelets 4. Cross the ends over and feed into the 2nd set of eyelets up the shoe (skip past 2 sets of eyelets) 5.
Both ends now run straight up and emerge from the 3rd set of eyelets 6. Cross the ends over, feed under and emerge from the top set of eyelets (skip past 2 sets of eyelets). 1. The lace is run diagonally and emerges from the bottom left and the top right eyelets 2. The top (red) end of the lace is zig-zagged from the top set of eyelets down to the middle eyelets in a similar manner to the Shoe Shop Lacing 3. The bottom (orange) end of the lace is similarly zig-zagged from the bottom set of eyelets up to the middle eyelets. 1. Start with two pairs of different colour laces, preferably the wide, flat variety (I was lucky to receive two such pairs with my last runners!) 2. With one colour (orange in my example), lace the shoe using either Straight (Fashion) or Straight (Lazy) Lacing 3. With the other colour (red in my example), start at the bottom of the shoe and weave the lace in and out of the other lace until you reach the top 4. Fold around the top lace and head back down, weaving out and in until you reach the bottom 5.