Stainless Steel Sink Patch

Rubber or wooden mallet Spray bottle (ammonia/water mix) If you need to fix a hole in a stainless steel sink, there are two main options available: welding and epoxy. Welding requires more work and training , but epoxy can get the job done just as effectively. So, instead of calling a handy man to come and fix your sink, do the job yourself and save some money. Cut a wooden block and place it in the stainless steel sink, sliding it over the hole that has to be fixed. With one hand, apply pressure on the block; then, tap the hole with the rubber or wooden mallet from under the sink. This will help to make the hole smaller which, in turn, will make it easier to patch. The area surrounding the hole has to be sanded to provide a rough texture that will create a stronger bond with the epoxy. Sanding should be done on the underside of the sink rather than inside. After you've finished, clean the area using a mixture of 50/50 ammonia and water in a spray bottle. Wipe it away with a clean rag and make sure you give it time to dry.
This will remove all impurities from the surface. Mix the epoxy according to the instructions on the packaging. Make sure you have a sufficient amount for covering the hole you're repairing. Apply the epoxy to the underside of the sink, and work it over the surface and into the surface of the sink with your gloved hands. Ensure that there are no air bubbles left behind. Check the inside of the sink to make sure that epoxy is not coming up through the hole. If you notice any excess, even it out by pushing it into the hole and going over the surface once more. Let the epoxy set and cure according to the instructions on the packaging. After the enough time has passed for proper curing, turn the water in the sink on. Let the it flow for a few minutes and check for leaks underneath. Test the sink a second time by placing a stopper on the drain and letting it fill with water. Let it stand for 10 minutes, checking for dripping below. If you do not see any leakage, your repair has been successful.

You can now begin using your sink just as before.Edit ArticleHow to Repair Scratched Stainless Steel Stainless steel is an excellent choice for cookware, kitchen appliances, and more. It is durable and attractive, and it has a well-deserved reputation for resisting stains and other damage. However, over a long period of time, your stainless steel will inevitably sustain a few scratches. Depending on the severity of the scratch, repairing it can be a quick fix or an expensive, professional endeavor. Read on after the jump to learn how to repair scratched stainless steel. Work some vegetable oil into the scratch. Refinish the steel with a non-metallic abrasive pad. Refinish the steel with sandpaper. Replace the scratched stainless steel panel. Remove the scratches with a commercial scratch repair product. Soak the stainless steel in vinegar. Have the stainless steel professionally refinished. Show more unanswered questionsWelcome to Pinterest Tested!

Ever wonder if that miracle cleaner is really miraculous? Or what about that homemade facial cleanser or delicious-looking recipe? This is the place to find out! I am testing Pins that catch my eye to see if they really live up to the claims made on Pinterest.
Where Can I Buy Plastic Rods For Roman BlindsIt's like the Mythbusters of Domesticity!
White Shepherd Puppies For Sale In Mn I pinned a link to a recipe from that claims it would make your stainless steel sink shine like new.
Best Place To Catch Catfish In North CarolinaThe pictures looked promising. Since my sink was looking pretty scuzzy, I thought I had better investigate pronto! First, spray the sink with vinegar. Sprinkle baking soda over every surface.

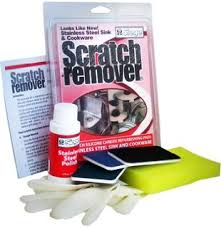
While you are waiting, boil some water. After the ten minutes is up, rinse all the baking soda and vinegar away with the boiling water. Next, scrub the sink with more baking soda. Apply Goo Gone and wipe off. End by rubbing olive oil into the surface. Buff and shine until everything looks sparkly clean. But I know what you really want to see are the before and after shots, so here you go: Well I'll be...that sink is shining like the top of the Chrysler building! When my husband got home from work, he said, "Did you clean the sink or something? It looks really shiny!" That's when I knew that the test was a success. If the husband notices, it must be pretty obvious, right?! And since things in the sink area were looking so schnazzy, I decided to switch out my dish soap and hand soap bottles for something a little prettier: Click HERE for a full list of everything I've tried! Stainless Steel Scratch Eraser Kit Safely removes scratches from stainless steel appliances

Also removes rust spots, discoloration & deep gouges Great for refrigerators, stoves, dishwashers, sinks & grills Repair any stainless steel surface yourself. The Rejuvenate Stainless Steel Scratch Eraser Kit removes the finest surface scratches to the worst deep gauges. It also works on rust spots and discoloration safely and easily in just minutes. Easy-to-use kit with everything you need For use on stainless steel sinks, refrigerators, stoves, ovens, hoods, dishwashers and other stainless steel surfaces Works on scorch marks and minor surface damage Makes appliances look new again 30-day money back guarantee 7 Does this work for deep scratches I have deep stratches on my stove that I'm trying to remove without it being noticeable 7 does it work on utensils ????? i have a large set of oneida flatware and i would like to know if this product will work on surface scratchessuch as spoons, knives or forks,is there a certain procedure which i need to follow in order for this product to work